- Why would you even want to do that?
- How this guide is built? (must read)
- Requirements
- Which server to choose and how to connect?
- Should you use Usenet and/or Torrents?
- Setup preliminaries
- Understand the architecture
- Setup Docker compose
- Setup subdomains and HTTPS
- Setup download clients
- Setup Prowlarr
- Setup Bazarr
- Setup *arr apps
- Setup Plex
- Setup Overseerr
- How to use
- Going forward
The Ultimate Guide to Setup Your Own Streaming Service with Sonarr, Radarr, Plex... using Usenet/Torrents
This guide provides a step-by-step approach to setting up your own movie and series streaming service using Sonarr, Radarr, Overseer, and Plex. Whether you prefer using Usenet or torrents, this guide has got you covered. Designed for both beginners and power users, the guide will help you stream your favorite movies and series with ease. Say goodbye to the hassle of unreliable streaming services and hello to endless entertainment with the help of this ULTIMATE Guide.
Why would you even want to do that?
Although the rise of other streaming services than Netflix had a very positive impact on the industry -- for the customer it means paying more and more monthly fees to streaming services, which can become very costly.
The setup carefully documented in this article -- while tedious if you don't have access to this ULTIMATE guide :) -- can save you a great amount of money while freeing you from large companies.
How this guide is built? (must read)
This guide is meant to serve all users, from beginners to power users, from a simple configuration to a more complete one with more features and a better ease of use.
This said, at the beginning of each part, a section will explain what it is about and if you can skip it.
Requirements
- A server (VPS or dedicated) and basic knowledge on how to connect. See below which one to choose and how to connect.
- Extremely basic knowledge on how to use a terminal.
- If you plan to use Usenet, a Usenet provider and a Usenet indexer. See below why you would want this.
- A free Plex account.
Which server to choose and how to connect?
You can freely skip this part if you already have a server and you know how to connect to it. Just be careful to make sure to have the recommended specifications defined below.
Which server to choose?
Your server will store movies and series, this uses a lot of storage, therefore you need to rent a server specialized in storage, a server which have a lot of storage available for a fair price. Many popular server providers have those kind of offers. They are often called Storage VPS.
Also you must be careful of the connection speed available (in Mbps or Gbps). In my opinion your server must have at least 500 Mps even if 1 Gbps is always better.
I also recommend having more than 2 GB of RAM available.
Note
I personally rent the STOR-4 offer at PulseHeberg but you absolutely don't need to rent here, many more hosting providers provide Storage VPS offers.
When you get the choice of the operating system, I recommend using the latest version of Ubuntu, it will make following this tutorial easier.
How to connect?
When you rent a server you get provided my two key information, the IP address of your server and the root password.
Note
For security reasons, using the
rootuser is a bad idea, but this goes out of the scope of this tutorial. Do your researches.
Using VSCode (recommended for ease of use)
- Install VSCode.
- Install the Remote - SSH extension.
- Click the bottommost-leftmost button > Connect to Host... > Add New SSH Host...
- Type
ssh root@<server-ip>(replace<server-ip>with your server IP address). - Enter the provided password.
- Press
ctrl + shift + `to open a terminal window.
Using a terminal
- Type
ssh root@<server-ip>(replace<server-ip>with your server IP address). - Enter the provided password.
Should you use Usenet and/or Torrents?
You can freely skip this part if you are already sure you'll use Usenet and/or Torrents. Just be careful to make sure to follow the appropriate instructions for each.
Quick comparison
| Usenet | Torrents | |
|---|---|---|
| price | paid | mostly free |
| speed | always fast | really depends |
Usenet
Usenet is a worldwide distributed discussion system available on computers according to Wikipedia. Basically, people upload all kind of stuff to usenet, including movies, series, books and musics.
To access Usenet, you need a server and Usenet servers are too expensive to be self-hosted, consequently you usually rent part of them.
Also to actually find content on Usenet you need something like a search engine, which is called an indexer in this context. Some free indexers exists out there but they usually have important limitations, consequently, the usage of a paid one is strongly recommended.
Note
I personally subscribed to Eweka for the Usenet server and NZGgeek for the Usenet indexer but you absolutely don't need to choose them, many more providers exist.
Torrents
BitTorrent (torrents) is a communication protocol for peer-to-peer file sharing (P2P), which enables users to distribute data and electronic files over the Internet in a decentralized manner according to Wikipedia.
To be able to search for torrents you need something like a search engine, which is called an tracker in this context.
3 types of trackers exist, public ones, semi-private ones and private ones.
You generally cannot register to private trackers.
For semi-private trackers you need to register to access them and you need to maintain a ratio. This means that you need to share the files you previously downloaded at least as much as you downloaded them. In practice this means that you should not delete your files once you downloaded them so others are able to download theirs from you.
For public trackers you don't need to maintain a ratio but you still should, because if nobody shares the files they download, nobody would be able to download them. Be fair.
Setup preliminaries
You cannot skip this part.
Connect to your server
See this.
Install Docker
Steps from here.
sudo apt-get remove docker docker-engine docker.io containerd runc
sudo apt-get update
sudo apt-get install ca-certificates curl gnupg lsb-release
sudo mkdir -p /etc/apt/keyrings
curl -fsSL https://download.docker.com/linux/ubuntu/gpg | sudo gpg --dearmor -o /etc/apt/keyrings/docker.gpg
echo "deb [arch=$(dpkg --print-architecture) signed-by=/etc/apt/keyrings/docker.gpg] https://download.docker.com/linux/ubuntu $(lsb_release -cs) stable" | sudo tee /etc/apt/sources.list.d/docker.list > /dev/null
sudo apt-get update
sudo apt-get install docker-ce docker-ce-cli containerd.io docker-compose-plugin
Setup the directory tree
Go to your desired directory (eg. ~/).
Create this folder structure:
library
├── config
│   ├── bazarr
│   ├── lidarr
│   ├── overseerr
│   ├── plex
│   ├── prowlarr
│   ├── flood-rtorrent
│   ├── radarr
│   ├── readarr
│   ├── sabnzbd
│   └── sonarr
└── data
    ├── media
    │   ├── books
    │   ├── movies
    │   ├── musics
    │   └── series
    ├── torrent
    │   ├── library
    │   └── other
    └── usenet
        ├── library
        └── other
You can use those commands to do it automatically for you.
mkdir -p library/config library/data
cd library/config
mkdir overseerr prowlarr bazarr sabnzbd flood-rtorrent sonarr radarr lidarr readarr plex
cd ../data
mkdir -p media/movies media/series media/books media/musics
mkdir -p usenet/library usenet/other
mkdir -p torrent/library torrent/other
cd ..
Setup permissions
sudo useradd library-user
sudo chown -R library-user:library-user .
🎉 You're done with the basics 🎉
Understand the architecture
You cannot skip this step.
graph LR

User--request a movie/series-->Overseerr
Overseerr--if movie-->Radarr
Overseerr--if series-->Sonarr
Readarr & Lidarr & Radarr & Sonarr--search through indexers-->Indexers
Bazarr--download subtitles-->Plex
Indexers--"send NZB (usenet)"-->SABnzbd
Indexers--send torrent file-->Flood/rTorrent
SABnzbd & Flood/rTorrent--move to library-->Plex
Plex--accessible to-->User
The graph above is a simplified version, if you want to understand the architecture more deeply extent the one below.
Real architecture
graph LR

subgraph .
  Readarr & Lidarr & Radarr & Sonarr
  Bazarr--download subtitles-->Plex
end
subgraph 1. request
  User--request a movie/series-->Overseerr
  Overseerr--if movie--->Radarr
  Overseerr--if series--->Sonarr
end
subgraph 2. search
  Prowlarr--sync indexers across *arr apps-->Indexers
  Readarr & Lidarr & Radarr & Sonarr --1st--- A[search through indexers]:::empty -->Indexers
end
subgraph .
  Readarr & Lidarr & Radarr & Sonarr--3rd---D[move to library]:::empty-->Plex
  Indexers-->E[give the download file]:::empty-->Readarr & Lidarr & Radarr & Sonarr
end
subgraph 3. download
  Readarr & Lidarr & Radarr & Sonarr--2nd---B["send NZB (usenet)"]:::empty-->SABnzbd
  Readarr & Lidarr & Radarr & Sonarr--2nd---C[send torrent file]:::empty-->Flood/rTorrent
end

classDef empty width:0px,height:0px;
Setup Docker compose
You cannot skip this part.
Setup docker-compose.yml
cd <your-library-directory>
sudo touch docker-compose.yml
sudo chmod a+w docker-compose.yml
Edit the file using either code docker-compose.yml or nano docker-compose.yml.
Paste this inside
services:
  #Request
  overseerr:
    image: sctx/overseerr:latest
    container_name: library-overseerr
    env_file:
      - .env
    volumes:
      - $ROOT_DIR/config/overseerr:/app/config
    ports:
      - 5055:5055
    restart: unless-stopped
  #Search
  prowlarr:
    image: lscr.io/linuxserver/prowlarr:develop
    container_name: library-prowlarr
    env_file:
      - .env
    volumes:
      - $ROOT_DIR/config/prowlarr:/config
    ports:
      - 9696:9696
    restart: unless-stopped
  bazarr:
    image: lscr.io/linuxserver/bazarr:latest
    container_name: library-bazarr
    env_file:
      - .env
    volumes:
      - $ROOT_DIR/config/bazarr:/config
      - $ROOT_DIR/data:/data
    ports:
      - 6767:6767
    restart: unless-stopped
  #Download
  sabnzbd:
    image: lscr.io/linuxserver/sabnzbd:latest
    container_name: library-sabnzbd
    env_file:
      - .env
    volumes:
      - $ROOT_DIR/config/sabnzbd:/config
      - $ROOT_DIR/data/usenet:/data/usenet
    ports:
      - 8080:8080
    restart: unless-stopped
  flood:
    image: jesec/flood
    container_name: library-flood
    user: ${PUID}:${PGID}
    command: --port 8081 --allowedpath /data
    env_file:
      - .env
    volumes:
      - $ROOT_DIR/config/flood-rtorrent:/config
      - $ROOT_DIR/data/torrent:/data
    ports:
      - 8081:8081
    restart: unless-stopped
  rtorrent:
    image: jesec/rtorrent
    container_name: library-rtorrent
    user: ${PUID}:${PGID}
    command: -o network.port_range.set=6881-6881,system.daemon.set=true
    env_file:
      - .env
    volumes:
      - $ROOT_DIR/config/flood-rtorrent:/config
      - $ROOT_DIR/data/torrent:/data
    ports:
      - 6881:6881
    restart: unless-stopped
  #Manage
  sonarr:
    image: lscr.io/linuxserver/sonarr:latest
    container_name: library-sonarr
    env_file:
      - .env
    volumes:
      - $ROOT_DIR/config/sonarr:/config
      - $ROOT_DIR/data:/data
    ports:
      - 8989:8989
    restart: unless-stopped
  radarr:
    image: lscr.io/linuxserver/radarr:latest
    container_name: library-radarr
    env_file:
      - .env
    volumes:
      - $ROOT_DIR/config/radarr:/config
      - $ROOT_DIR/data:/data
    ports:
      - 7878:7878
    restart: unless-stopped
  lidarr:
    image: lscr.io/linuxserver/lidarr:latest
    container_name: library-lidarr
    env_file:
      - .env
    volumes:
      - $ROOT_DIR/config/lidarr:/config
      - $ROOT_DIR/data:/data
    ports:
      - 8686:8686
    restart: unless-stopped
  readarr:
    image: lscr.io/linuxserver/readarr:develop
    container_name: library-readarr
    env_file:
      - .env
    volumes:
      - $ROOT_DIR/config/readarr:/config
      - $ROOT_DIR/data:/data
    ports:
      - 8787:8787
    restart: unless-stopped
  #Watch
  plex:
    image: lscr.io/linuxserver/plex:latest
    container_name: library-plex
    network_mode: host
    env_file:
      - .env
    volumes:
      - $ROOT_DIR/config/plex:/config
      - $ROOT_DIR/data/media:/data/media
    restart: unless-stopped
As you can see this file is composed of a list of services: overseerr, prowlarr, bazarr...
- If you don't plan on needing subtitles you can remove bazarr.
- If you don't plan on using Usenet you can remove sabnzbd.
- If you don't plan on using torrents you can remove flood and rtorrent.
- If you don't plan on downloading (TV) series you can remove sonarr.
- If you don't plan on downloading movies you can remove radarr.
- If you don't plan on downloading books you can remove readarr.
- If you don't plan on downloading musics you can remove lidarr.
Setup .env
cd <your-library-directory>
sudo touch .env
sudo chmod a+w .env
Edit the file using either code .env or nano .env.
Paste this inside
#General
PUID=1001
PGID=1001
TZ=Europe/Helsinki
ROOT_DIR=/home/hunam/library

#Plex
VERSION=docker
PLEX_CLAIM=claim-e28c7sXCehDxcKVBHEA1
Run id library-user and paste the uid value to the PUID variable and the the gid value to the PGID variable.
Set the TZ variable to your timezone.
Set the ROOT_DIR variable to the output of the pwd command.
Start Docker compose
cd <your-library-directory>
sudo docker compose up -d
🎉 You're done with Docker compose 🎉
Setup subdomains and HTTPS
You can freely skip this part if you don't have a domain name or don't want to setup it. If you have a domain name it's recommended to setup this for ease of use of your home brewed library and being able to access it with a secure HTTPS connection.
Setup the subdomains
Connect to your DNS provider dashboard. It will look similar to this:
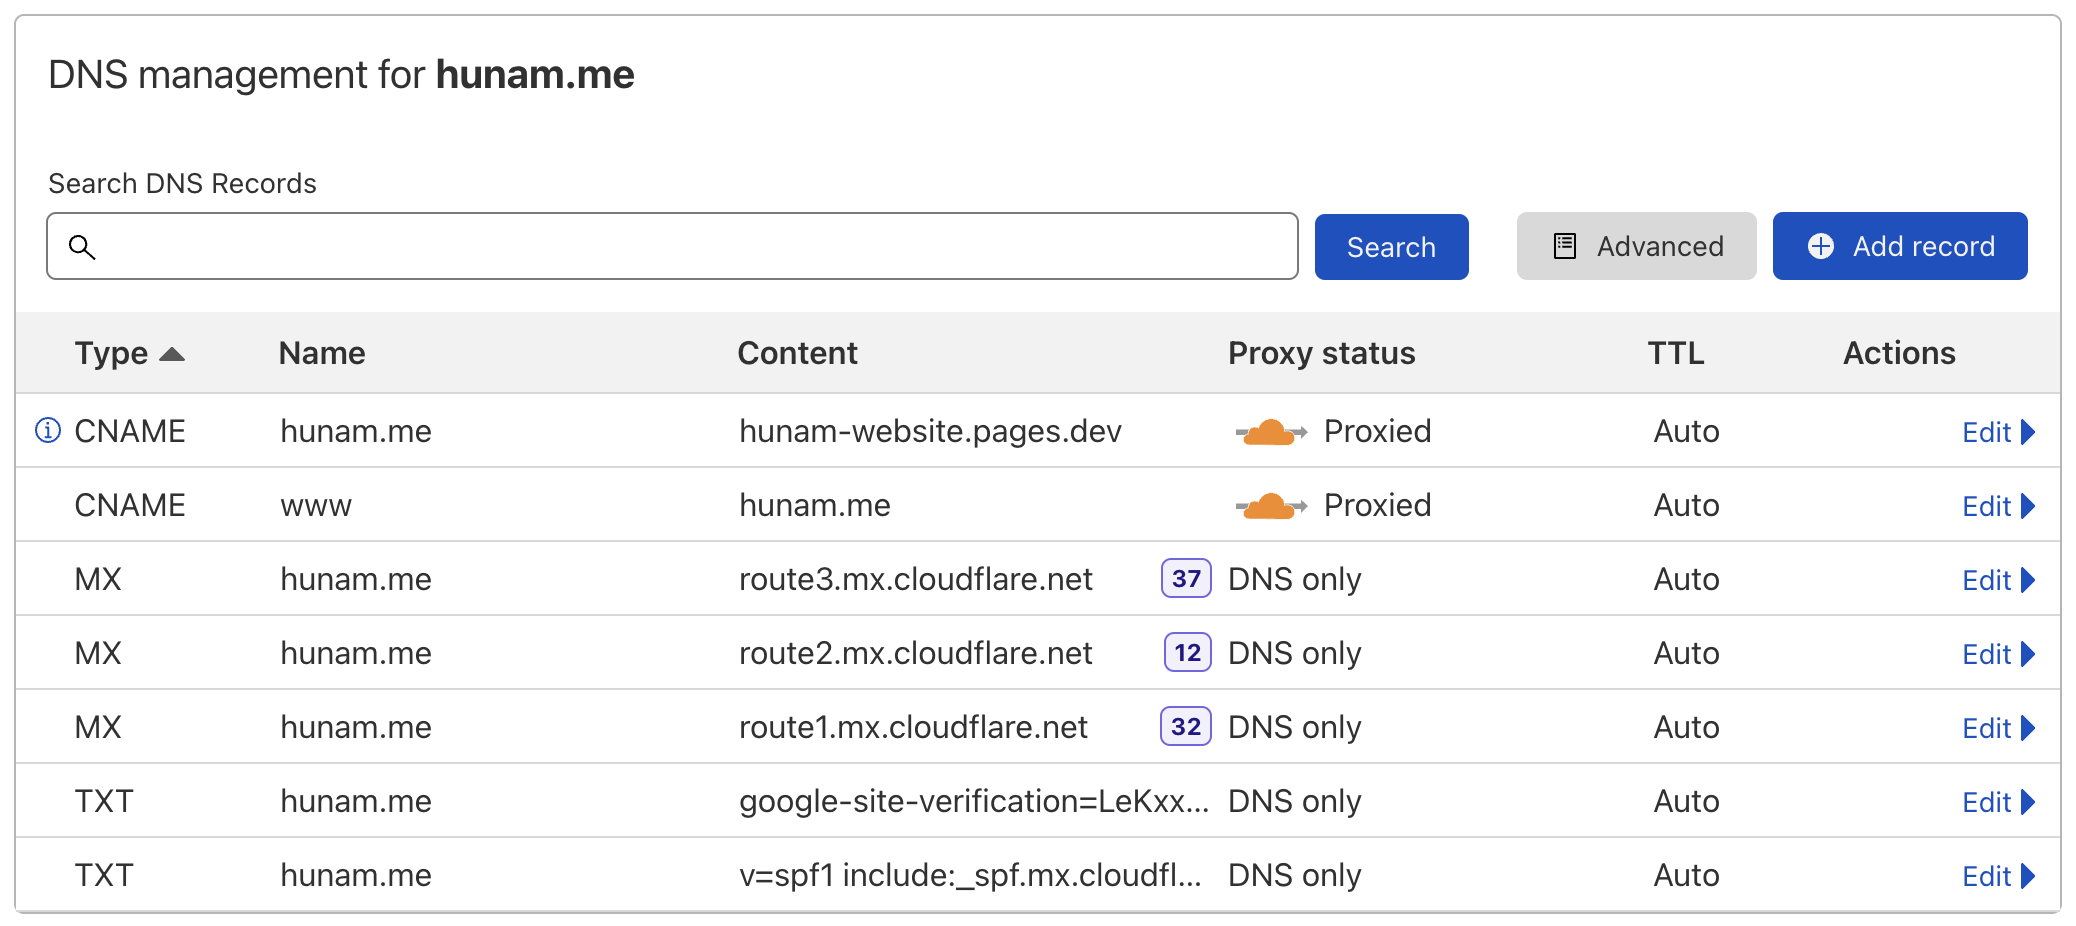
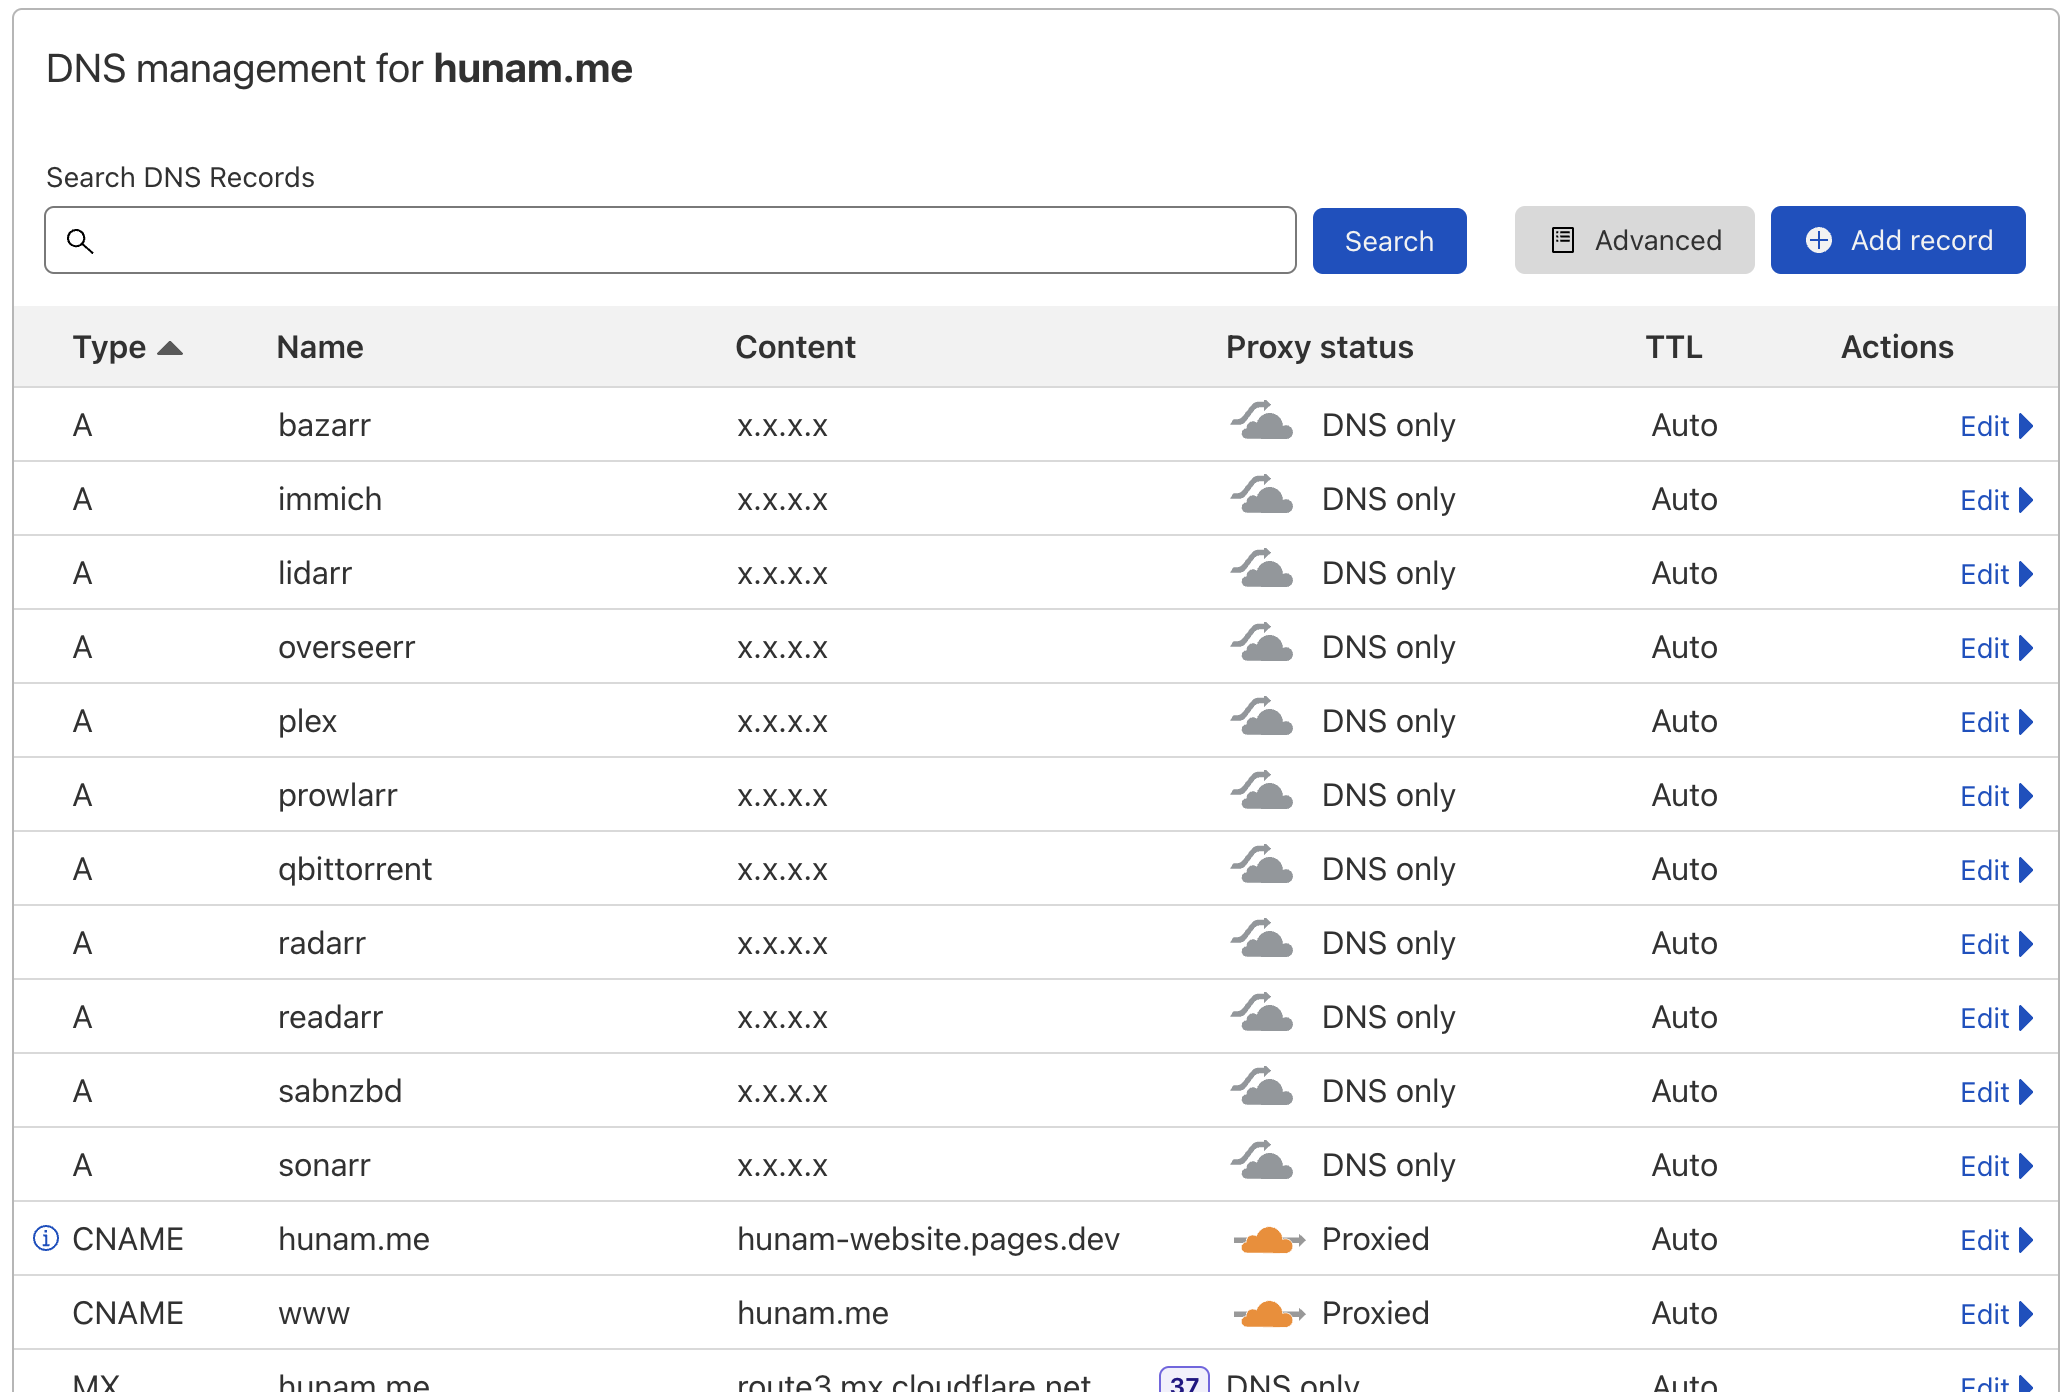
You need to add a A record for every subdomain the content of the record will be your server's IP address. It will look similar to this:
Setup Caddy
Install Caddy (steps from here).
sudo apt install -y debian-keyring debian-archive-keyring apt-transport-https
curl -1sLf 'https://dl.cloudsmith.io/public/caddy/stable/gpg.key' | sudo gpg --dearmor -o /usr/share/keyrings/caddy-stable-archive-keyring.gpg
curl -1sLf 'https://dl.cloudsmith.io/public/caddy/stable/debian.deb.txt' | sudo tee /etc/apt/sources.list.d/caddy-stable.list
sudo apt update
sudo apt install caddy
Create the configuration file
cd <your-library-directory>
sudo touch Caddyfile
sudo chmod a+w Caddyfile
Edit the file using either code Caddyfile or nano Caddyfile.
Paste this inside
overseerr.example.org {
	reverse_proxy localhost:5055
}
prowlarr.example.org {
	reverse_proxy localhost:9696
}
bazarr.example.org {
	reverse_proxy localhost:6767
}
sabnzbd.example.org {
	reverse_proxy localhost:8080
}
flood.example.org {
	reverse_proxy localhost:8081
}
sonarr.example.org {
	reverse_proxy localhost:8989
}
radarr.example.org {
	reverse_proxy localhost:7878
}
lidarr.example.org {
	reverse_proxy localhost:8686
}
readarr.example.org {
	reverse_proxy localhost:8787
}
plex.example.org {
	reverse_proxy localhost:32400
}
Replace example.org with your domain name.
Run Caddy
cd <your-library-directory>
sudo caddy stop
sudo caddy start
Warning
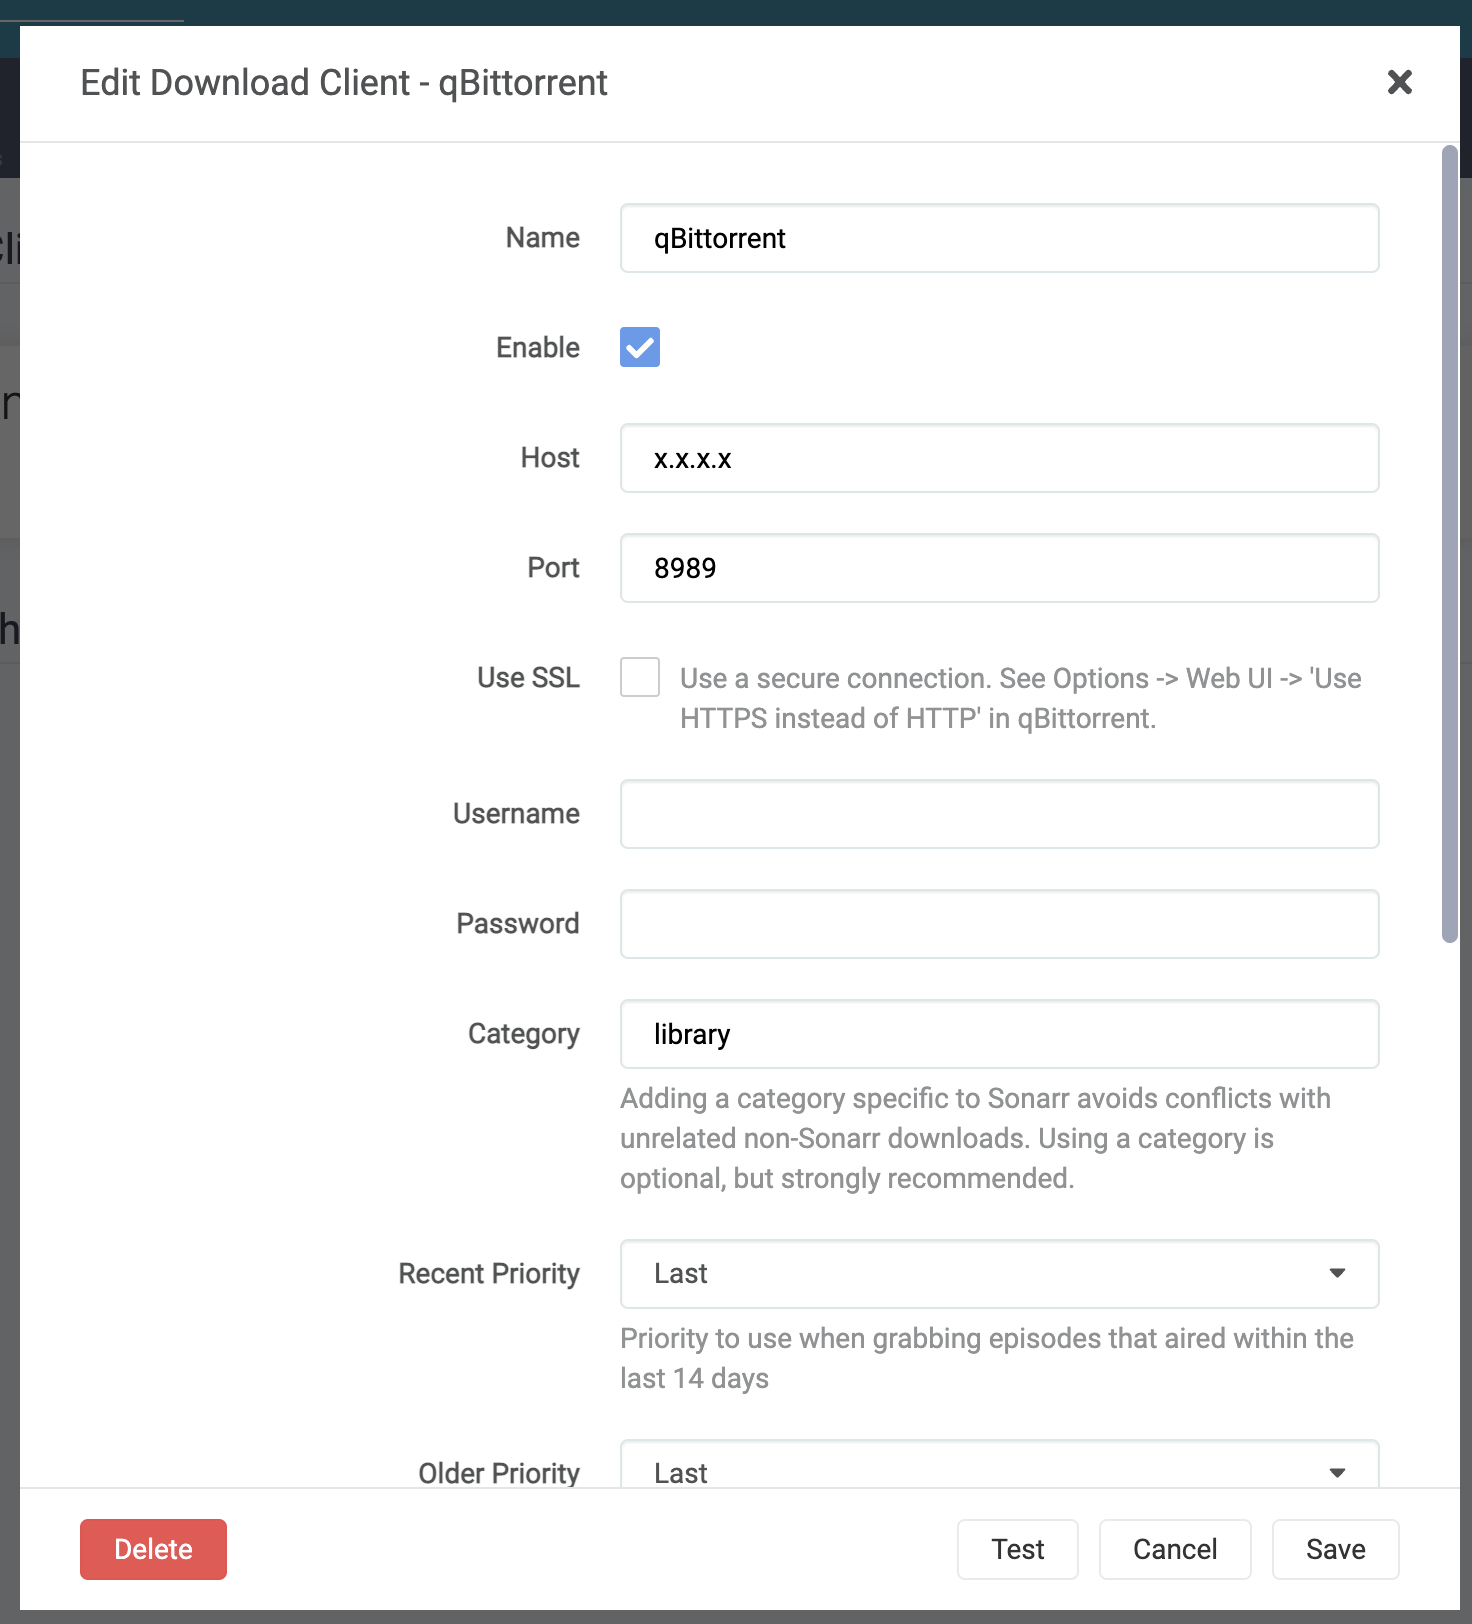
In the guide you will often find configuration panels similar to this one:
You will always need to set host to
<service-name>.<your-domain-name>instead of what asked, port to443instead of what asked and check theSSLcheckbox.
🎉 You're done with Caddy 🎉
Setup download clients
You cannot skip this part.
Usenet
Allow remote access to SABnzbd.
cd <your-library-directory>
cd config/sabnzbd
sudo chmod a+rw sabnzbd.ini
Edit the file using either code sabnzbd.ini or nano sabnzbd.ini. Modify the variable inet_exposure (line 33) to inet_exposure = 4.
Warning
If you set up the subdomains and HTTPS you should also modify the variable
host_whitelist(line 148) by adding your hostname at the end. It will look similar tohost_whitelist = 78d983e0ae14,sabnzbd.example.org.
Restart Docker compose using sudo docker compose restart.
Access SABnzbd in a browser (<your-server-ip>:8080).
Note
If you set up the subdomains and HTTPS you should access it using
sabnzbd.example.org.
Select the desired language, click Start Wizard.
Configure the fields according to what your Usenet providers gives you. For example with those information:
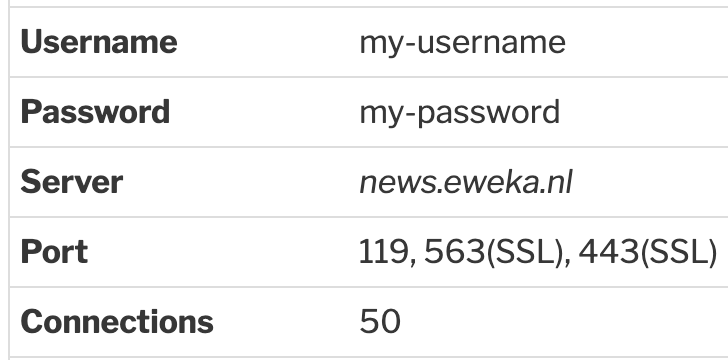
I would setup SABnzbd like this:
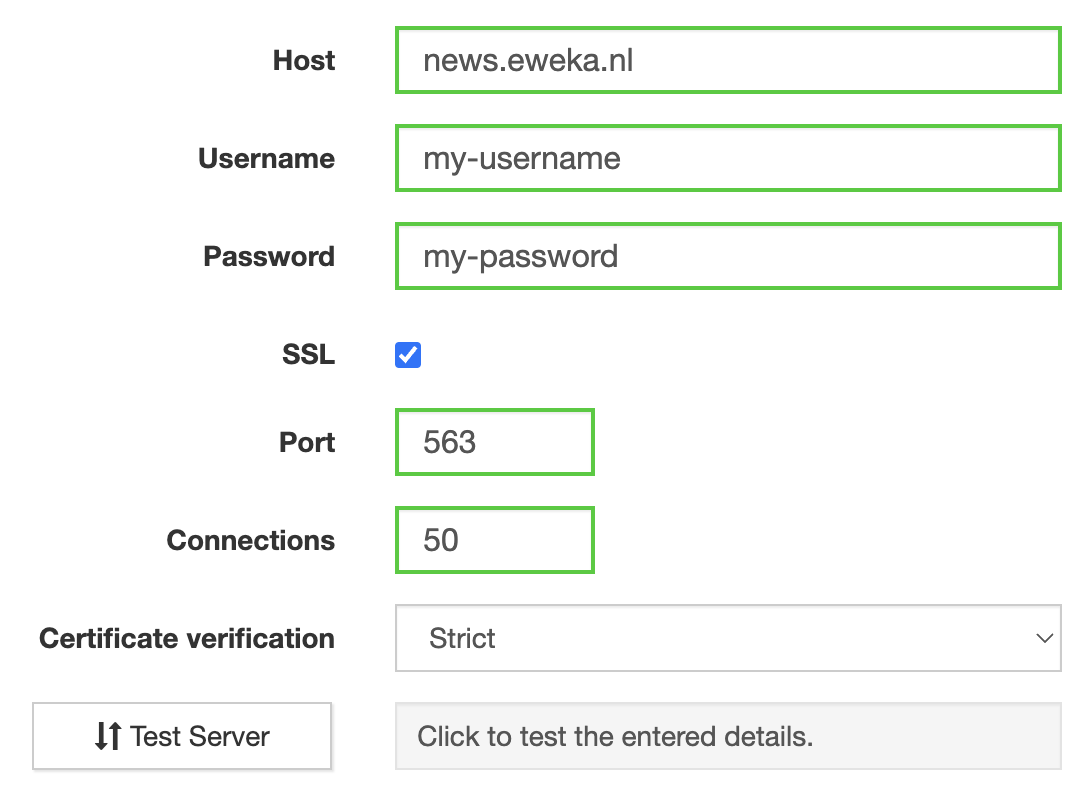
Click Test Server to make sure you entered the fields correctly, click Next, click Go to SABnzbd, click the top-right gear icon, click General.
Set a SABnzbd Username and a SABnzbd Password and click the Save Changes button bellow, click OK in the popup and wait for the restart to complete. You can now login and go to the settings again.
Go to the Folders tab and configure the Completed Download Folder to /data/usenet, save changes.
Go to the Catagories tab and remove all the default categories using the trash bin icons on the right. Configure the default category's Folder/Path to other, save. Add a new category named library with Folder/Path set to library, click Add.
Go to the Switches tab and tick Direct Unpack under Queue, save.
🎉 You're done with SABnzbd 🎉
torrents
Access Flood in a browser (<your-server-ip>:8081).
Note
If you set up the subdomains and HTTPS you should access it using
flood.example.org.
TODO: see with Mark what's needed.
Login with user: admin, pwd: adminadmin. Click the settings gear on the top.
Set the Default Save Path under Saving Management to /data/torrent/other.
Go to the Web UI tab and set a Username and a Password under Authentication.
Go all the way down and click Save.
On the left panel, under CATEGORIES, right click All, then Add category... and set the name to library and the save path to /data/torrent/library.
🎉 You're done with Flood 🎉
Setup Prowlarr
You cannot skip this part.
Access Prowlarr in a browser (<your-server-ip>:9696).
Note
If you set up the subdomains and HTTPS you should access it using
prowlarr.example.org.
Click Add indexer on the top panel, search for the Usenet or torrent indexers you want to add and click on Save.
Note
In my case I search for
NZBgeekand fill this form with my NZBgeek's API key.I also want this indexer to have the most priority so I set the Indexer priority field to
1. Then I want to add a french torrent indexer but with a priority set to2etc.
Note
If you don't want to use Usenet and you don't know what torrent indexers to use, set the Privacy filter to
Publicand add some.
On the left side panel click Settings, then General, set the Authentication field to Form (Login Page), fill the Username and Password fields and click Save on the top panel.
On the left side panel click Settings, then UI, then you may want to change some formats under the Dates category and click Save on the top panel.
On the left side panel click Settings, then Apps, then the + icon.
These steps will need to be repeated for Sonarr, Radarr, Lidarr (if you want to download music/audio) and Readarr (if you want to download eBooks).
Click on Sonarr/Radarr/Lidarr/Readarr.
Set Sync Level to Full Sync.
In the Prowlarr Server field enter http://<your-server-ip>:9696, replace <your-server-ip> by your server IP address.
Note
If you set up the subdomains and HTTPS you should set the field to
prowlarr.example.orginstead.
In the *arr Server field enter http://<your-server-ip>:<the-*arr-app-port>, replace <the-*arr-app-port> by 8989 for Sonarr, by 7878 for Radarr, by 8686 for Lidarr and by 8787 for Readarr.
Note
If you set up the subdomains and HTTPS you should set the field to
<the-*arr-app-name>.example.orginstead.
Access the *arr app using a browser, on the left side panel click Settings, then General, then copy the API Key under Security. Paste it in the ApiKey field, press Save.
🎉 You're done with Prowlarr 🎉
Setup Bazarr
You cannot skip this part.
Access Bazarr in a browser (<your-server-ip>:6767).
Note
If you set up the subdomains and HTTPS you should access it using
bazarr.example.org.
General
On the left side panel click Settings, then General, set the Authentication field to Form, fill the Username and Password fields and click Save on the top panel.
Languages
On the left side panel click Settings, then Languages, in the Languages Filter field select the language(s) you want to request for subtitles and click Add New Profile.
Write Main in the Name field. Click on Add Language n times while n being the number of languages your want your subtitles in. In the second row of the table make sure each line have a unique language. Click Save.
Enable the two switches under Default Settings, click on Save on the upper panel.
Providers
On the left side panel click Settings, then Providers, then click on +. Most subtitles providers require login-in, therefore you will most likely need to first create an account on the provider website and then fill your Username and Password of that provider the fields you will get after selecting a provider.
I personally recommend to add at least OpenSubtitles.com and then to scroll though the list to see if some providers may provide you with subtitles in your native language.
Click on Save each time and on + again if you want to add another one.
Click on the top panel Save button.
Sonarr & Radarr
On the left side panel click Settings, then Sonarr, then enable it.
Fill the Address field with <your-server-ip>.
Note
If you set up the subdomains and HTTPS you should fill the Address field with
sonarr.example.org, the Port field with443and enable SSL.
Access the Sonarr app using a browser, on the left side panel click Settings, then General, then copy the API Key under Security. Paste it in the API Key field.
Press Test and then the Save button on the top panel.
On the left side panel click Settings, then Radarr, then enable it and then perform the same last actions but with Radarr.
🎉 You're done with Bazarr 🎉
Setup *arr apps
These steps will show the setup for all Sonarr, Radarr, Lidarr and Readarr apps at the same time because they are very similar. You are free to skip either Lidarr and/or Readarr if you don't want to download musics/audios and/or eBooks respectively.
Access *arr in a browser (<your-server-ip>:<the-*arr-app-port>), replace <the-*arr-app-port> by 8989 for Sonarr, by 7878 for Radarr, by 8686 for Lidarr and by 8787 for Readarr.
Note
If you set up the subdomains and HTTPS you should set the field to
<the-*arr-app-name>.example.orginstead.
Root folder
On the left side panel click Settings, then Media Management.
Sonarr and Radarr specific
Click on Add Root Folder under Root folders. Navigate to /data/media/series/
for Sonarr, to /data/media/movies/ for Radarr and click Ok.
Lidarr and Readarr specific
Click on + under Root folders. Set the Name field to Main. For the Path
field navigate to /data/media/musics/ for Lidarr, to /data/media/books/ for
Readarr and click Save.
Language
Sonarr specific
On the left side panel click Settings, then Profiles, then click on English under Language Profiles. You may want to add more languages then English, tick the one you want, change the Name field to Main and click Save.
Radarr specific
On the left side panel click Settings, then Profiles, then for each quality
you will use: click the quality name, set the Language field to Original and
click Save.
Quality
Sonarr and Radarr specific
On the left side panel click Settings, then Quality, then click on Show Advanced's
gear icon on the top. I my case I watch movies and series in 1080p, so for each
quality name that contains 1080 I will set its corresponding Max field to something
like 67,5. This way, *arr will only download files with a maximum ratio of 4GB
per hour. Otherwise your server's disk will get full quickly. Radarr requires
you to set a Preferred value too. Click Save.
Download clients
On the left side panel click Settings, then Download Clients, then click on +.
Usenet specific
Click on SABnzbd, write SABnzbd in the Name field. Write <your-server-ip> in the Host field and 8080 in the Port field.
Note
If you set up the subdomains and HTTPS you should write
sabnzbd.example.orgin the Host field,443in the Port field and tick Use SSL.
Access SABnzbd in a new tab. Click on the top-right gear icon, then the General tab and copy the API Key under Security. Paste this key in the API Key field.
Fill the Username and Password fields with the same one you used in the SABnzbd settings.
Write library in the Category field and press Save.
Torrent specific
TODO: see with Mark what's needed
Go down, click on qBittorrent, write qBittorrent in the Name field. Write <your-server-ip> in the Host field and 8081 in the Port field.
Note
If you set up the subdomains and HTTPS you should write
qbittorrent.example.orgin the Host field,443in the Port field and tick Use SSL.
Fill the Username and Password fields with the same one you used in the SABnzbd settings.
Write library in the Category field and press Save.
General
On the left side panel click Settings, then General, set the Authentication field to Form (Login Page), fill the Username and Password fields and click Save on the top panel.
Sonarr specific
Warning
If you set up the subdomains and HTTPS on the left side panel click Settings, then General, you must set the Application URL field under Host to
https://sonarr.example.organd click Save.
On the left side panel click Settings, then UI, then you may want to change some formats under the Calendar and Dates categories and click Save on the top panel.
🎉 You're done with one *arr app 🎉
Now do this again for each *arr app :).
🎉 You're done with every *arr app 🎉
Setup Plex
You cannot skip this part.
cd <your-library-directory>
sudo docker compose stop
Edit the .env file using either code .env or nano .env.
Go to plex.tv/claim and paste the code to your PLEX_CLAIM variable.
Relaunch Docker compose using sudo docker compose up -d.
Access Plex in a browser (<your-server-ip>:32400).
Note
If you set up the subdomains and HTTPS you should access it using
plex.example.org.
Click GOT IT!, close the popup, give your library a nice name.
Click ADD LIBRARY, then Movies, then NEXT, then BROWSE FOR MEDIA FOLDER, browse to /data/media/movies, click ADD LIBRARY.
Click ADD LIBRARY, then TV Shows, write Series in the Name field, then click on NEXT, then BROWSE FOR MEDIA FOLDER, browse to /data/media/series, click ADD LIBRARY.
Click ADD LIBRARY, then TV Shows, write Musics in the Name field, then click on NEXT, then BROWSE FOR MEDIA FOLDER, browse to /data/media/musics, click ADD LIBRARY.
Click on NEXT then DONE, uncheck Live TV, Movies & Shows and Music, click on FINISH SETUP, close the popup.
Click the top-right wrench icon.
On the left side panel, scroll down and click on Library under SETTINGS. Tick Scan my library automatically and Scan my library periodically. Set the Generate video preview thumbnails and Generate chapter thumbnails fields to as a scheduled task and when media is added and click on SAVE CHANGES.
On the left side panel, click on Quality under PLEX WEB, here you may want to set a different default Video quality, 10 Mbps, 1080p as for myself.
You can now directly access Plex via plex.tv.
🎉 You're done with Plex 🎉
Setup Overseerr
You cannot skip this part.
Access Overseerr in a browser (<your-server-ip>:5055).
Note
If you set up the subdomains and HTTPS you should access it using
overseerr.example.org.
Sign in with Plex.
Click the refresh icon on the right, wait and select the first entry. Click on Save changes, select Movies and Series and click on Continue.
Radarr & Sonarr
Click on Add Radarr Server, tick Default server, write Radarr in the Server name field, write <your-server-ip> in the Hostname or IP Address field.
Note
If you set up the subdomains and HTTPS you should write
radarr.example.orginstead, write443in the Port field and tick Use SSL.
Access the Radarr app using a browser, on the left side panel click Settings, then General, then copy the API Key under Security. Paste it in the API Key field.
Click the Test yellow button. Select your desired quality profile, select the only root folder available.
Sonarr specific
Select the only language profile available, select your desired anime quality profile, select the only root folder available, select the only anime language profile available and tick Season Folders.
Tick Enable Scan and click Add Server.
Perform the same last actions but with Sonarr now.
Click Finish Setup.
Click Settings, the Users tab, go down a bit and tick Auto-Approve, then tick Auto-Request and click Save Changes.
🎉 You're done with Overseerr 🎉
How to use
You can freely skip this part if you already know how to use Overseerr and Plex.
Overseerr
Congratulations for following up this guide until the end! Now you are able to request a movie/series/TV show directly from Overseerr and watch it from Plex.
Access Overseerr in a browser (<your-server-ip>:5055).
Note
If you set up the subdomains and HTTPS you should access it using
overseerr.example.org.
Search for a movie/series/TV show on the top search bar, select the correct one, click request, if it's a series you select the season(s) you want, click confirm and that's it!
If you click on that movie again you can quickly access it's corresponding Sonarr/Radarr page.
I can recommend you lurking around the app to discover nice features and have fun while your movie is downloading :)
Plex
Access Plex in a browser via plex.tv.
Click on the top-right wrench icon, on the left side panel click on Manage Library Access.
You can easily invite your friends and family to your Plex and Overseer, just ask them to create a Plex account, then you can add them by clicking on GRANT LIBRARY ACCESS and entering their email/username. This way they can request movies too and watch them too, just like you.
I can recommend you lurking around the app to discover nice features :)
Going forward
You can freely skip this step if you want to.
In this part it will not be a step-by-step guide but ideas to improve your nearly set up ULTIMATE Overseerr n' Plex n' chill.
- You check out the amazing mobile (iOS/Android) app LunaSea. It gives you a very nice looking interface to access your SABnzbd, Sonarr, Radarr and Lidarr apps. Of course it has many other nice features.
This guide has been a long time in the planning and writing process. If you enjoyed it consider writing a comment to this article and following me on Github (@Hunam6) and Twitter (@Hunam_). Thank you 🙏
Made by ❤️ with 🌸 power by @Hunam6.
